
In this tutorial, we explain how to register Work-from-home days. You create schedules in which you specify your work days. Thrivey then automatically determines what a work-from-home day is based on your journeys. If you have a business trip on a workday, then it is an on-site workday. If you have no business trip on a workday, then it’s a work-from-home day. Of course, you can adjust this manually.
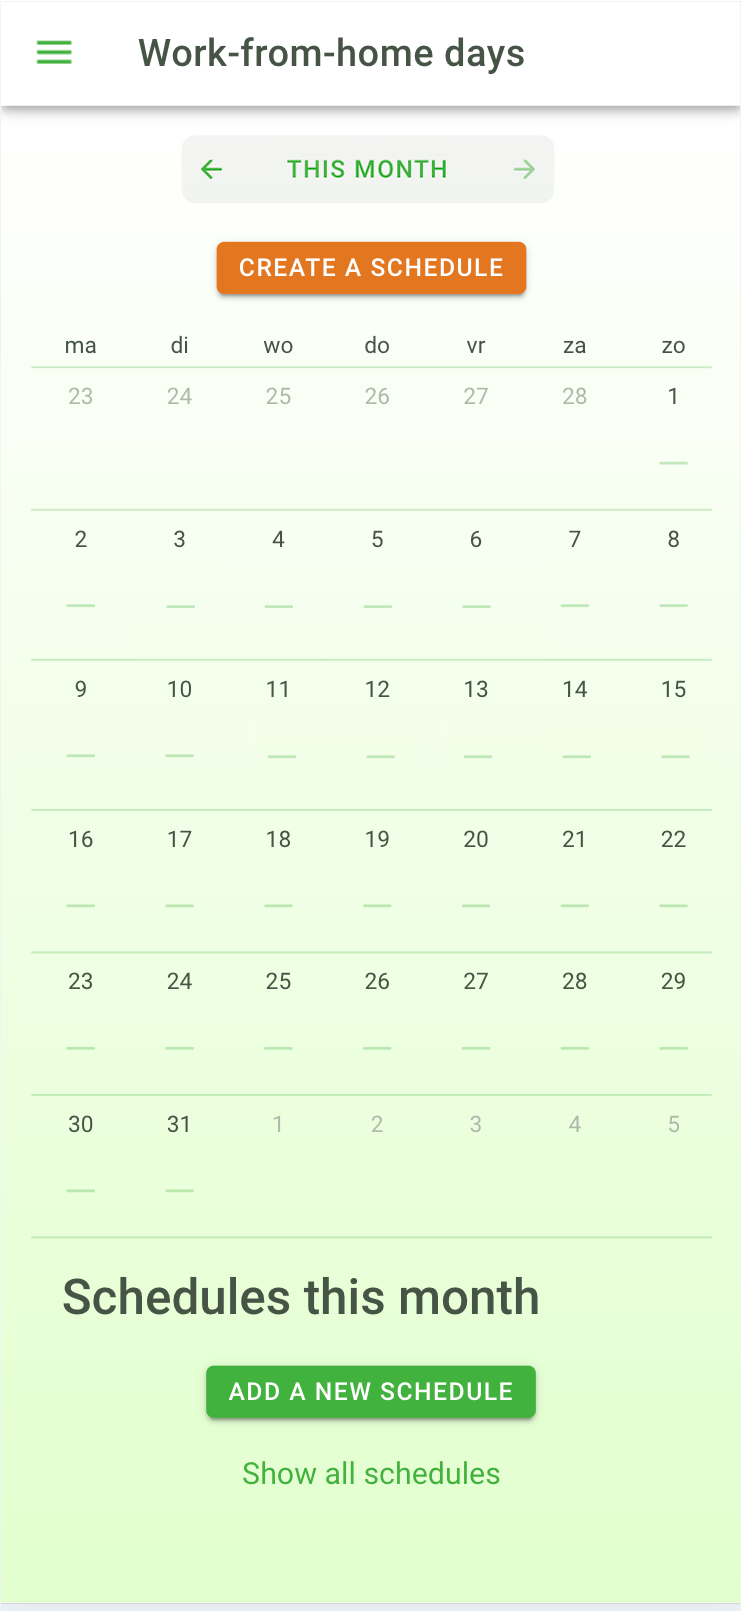
'Work-from-home days' screen.
From top to bottom you see:
- Month indication
With the arrows you can go to the previous / next month - Create a schedule (Orange button)
- Calendar
This is initially empty but after this tutorial will contain a list of Work-from-home days, working on-site, no work day or not filled in. - Overview of schedules of this month, with ‘Add a new schedules’ button and ‘Show all schedules’ link. This section is empty at the start.
Schedules
By entering your workdays in schedules, Thrivey records whether you work from home or on-site on those days. You can always change this manually afterwards.
Schedule creation
In 3 easy steps you create a schedule:
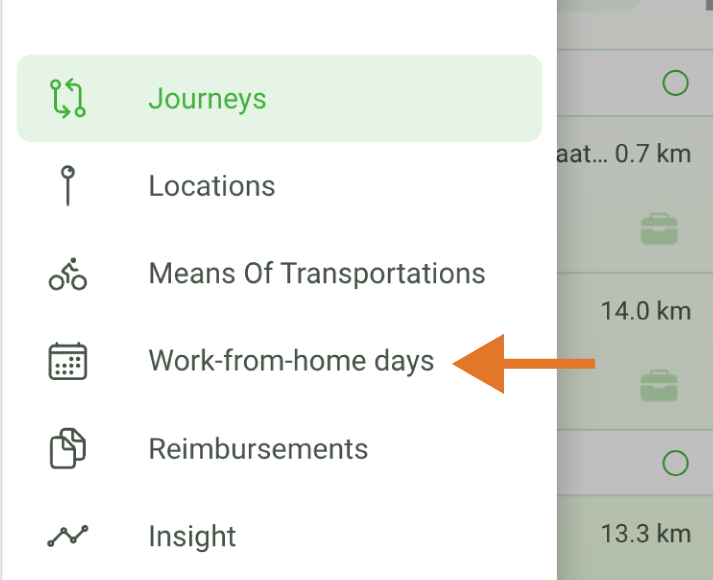
1. From the main menu, tap 'Work-from-home days'.
You are now in the Work-from-home Days screen.
2. Tap the orange 'create a schedule' button.
You are now in the schedule.
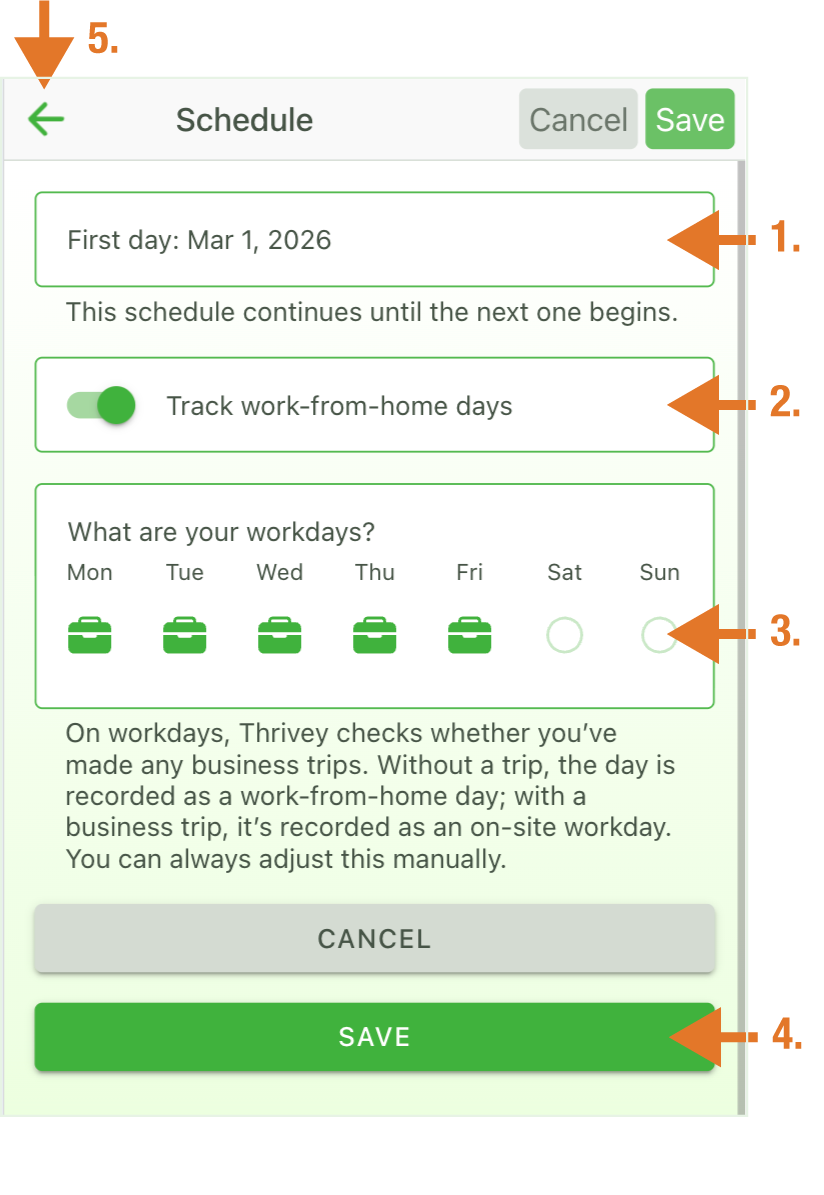
3. Adjust the schedule
- The first day will be on March 1, 2026.
There is no end date. A schedule with start date after the current start date constitutes the end date of this schedule. - Turn “Track work-from-home days” on or off.
If “on,” then Thrivey tracks whether a workday is a work-from-home day. If “off,” then Thrivey does not keep track of work-from-home days and a dash appears in the calendar. - Workdays default to Monday through Friday. Adjust these to your benefit.
- Tap “save.
- Tap ← to return to the work-from-home days overview page
Your workdays are now determined from the start date of this schedule. If you set the ‘track work-from-home days’ slider to ‘on’, Thrivey will now keep track of which days you work from home.
- You can adjust in the calendar, for today or in the past, whether this was a work-from-home day.
- You can create multiple schedules with ‘add a new schedule’ on the work-from-home days overview page
Work-from-home days are now created!
Please note that trips take place on “working on-site” days. We explain the calendar here.
Changing schedules
You can change and delete a schedule at any time by tapping the “schedule” heading in the Work-from-home days overview.
Show all schedules
In the overview screen of ‘Work-from-home days’ you will find a link to the overview of all created schedules. Tap this to view all schedules.
Calendar
Calendar icons
Here is an overview of the different icons accompanying the days with their meanings:

Work-from-home day

Work day on-site (The blue dot: business trips were made on this day)

No work day

Day in the future, or where there is no schedule for it
Customize calendar
If you want to change a day afterwards, for which you have created a schedule, you do so through the calendar:
- Tap a day. A menu appears with: Work-from-home days, on-site work days or no work day
- Tap the desired option
The type of day is now set.
Even if you delete a schedule, it remains manually indicated day registered.
Export
If you tap on the ‘Journeys’ menu item, the subsequent screen in the lower right corner contains the ‘Export’ button. This generates an Excel document that lists the work-from-home days as follows.
The total tab states:
- The total number of work-from-home days.
- The number of work-from-home days with business trips. This is a signal function: fiscally, the employer may not pay out a work-from-home day if it also pays out a business trip.
In the work-from-home days tab are the details:
- Per week which day was a work-from-home day.
- Whether there are business trips on that day.
- If the work-from-home day was manually adjusted, you will see when this was last done (date and time).